
แต่งหน้า: Silver Smokey Eyes & Thick Lashes (in Thai)
kungsuayjung65January 1, 2010
You can see how lashes make a difference when you compare in the video screen shot from the left and right eye. To me, I think it is about the types of lashes that you choose also. If you're trying to have natural but volumous lashes, you should choose a pair of lashes that have a thicker set band, but a thined out edge. This will not only give you dept, but also every time you blink it blends out nicely. Plus, it will show more of your shadow behind rather than hide it or barely visible- again, depending on the types of lashes you so choose. For this look, I chose a pair of lashes that are thick yet natural enough to suffice for both thickness and visibility. This is a typical smokey eye look, but we use a silver base to make the black shadow have an irredecient glow.
Here is the video to get an idea of how I accomplished this look:
แต่งหน้า: Silver Smokey Eyes & Thick Lashes (in Thai)
By Nan from Kung Suay JungYou can see how lashes make a difference when you compare in the video screen shot from the left and right eye. To me, I think it is about the types of lashes that you choose also. If you're trying to have natural but volumous lashes, you should choose a pair of lashes that have a thicker set band, but a thined out edge. This will not only give you dept, but also every time you blink it blends out nicely. Plus, it will show more of your shadow behind rather than hide it or barely visible- again, depending on the types of lashes you so choose. For this look, I chose a pair of lashes that are thick yet natural enough to suffice for both thickness and visibility. This is a typical smokey eye look, but we use a silver base to make the black shadow have an irredecient glow.
Here is the video to get an idea of how I accomplished this look:
Screen shots from the video of this look:
The begining steps are rather simple, I just take a pearly shimmer white color and apply it all over my lid on top of my shadow base.
From there we clean this up with a semi-matte cream skin color over the bottom lid, side, and bone of the eyebrow arch.
Following with the last shadow, a shimmer black. We apply this just below the pearly white color which was our first shadow.
So continue on with outlining our lids using a black pencil, wing out a bit, and cover up the lowerlid.
Curl lashes and apply mascara to thicken the base of our lashes, in preperation for our fake eyelashes.
Using a thick band lash, but thined out tip, we trim, measure to the lenght of our eye, and apply glue. Wait a few seconds for the glue to become semi dry and apply on top of your real lashes. Gently push in and upwards so that you have firm grip between your lashes and your skin. Stay as close as you can to your normal lashes so that it will not be obvious that we have two seperate lashes (aka fake and real).
Our finished look is not complete without some full glossy lips! I'm using a soft matte lip cream color from NYX in San Paulo, and topping it off with Stila's Grape Fruit gloss. This will give me a creamy gloss shine without any glitter whatsoever.
Lastly, contouring is a must for a slimmer face. I use a dark shade, you could use a bronzer, illuminator, etc., for this. Apply it to the hollow of your cheek.
Next is a rosey color blush. I apply this on top of my cheek bone, the highest point on my cheeks!
And using the cream color that we used as a highlighter, I also dusted some of this above my cheeks, but below my undereye to illuminate the rosey cheek color.
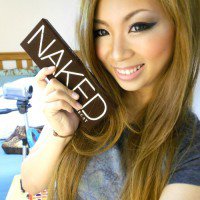
Here is a close up of the palette that I used for this look:
And we're done!
This is a photo that I took with flash:
As always, thank you for being with me today and giving me the opportunity to show you the steps to this look. I enjoy make up so much and love to share. Any questions or comments feel free to ask! I'd be more than happy to help :)
xoxo,
Nan
Discussion (5)